- Home
- >
- THINK AND ORGANIZE ITS COURSE
- >
- Design and storyboarding
- >
- FACILITATOR GUIDE - Open and distance learning
What isAN ODL SYSTEM ? ?
An ODL (Open and distance learning) system is a teaching system that does not rely solely on classroom training.
New technologies are only ever a resource for the stakeholders who need to make the system work. This is why, to benefit from these technological innovations, it is necessary to plan the organisation of these new teaching systems.
In reviewing our LMS, we noticed that we had to design a lot of educational resources in order to be able to create this ODL system. Each resource corresponds to an e-learning module. They use various media types depending on the decisions made at the time of their design (text, images, videos, animations, etc.).
On average, the educational programme takes place over several weeks with a few hours of work per week required of the learner outside of the classroom.
The workload for the learner – also known as learner work time – is distributed as follows: 1/3 of the time: consultation of audiovisual or textual content, 1/3 of the time: assessment with multiple-choice or open questions (forums, chat, etc.) and finally, 1/3 of the project time as an individual or joint tutored project as a common thread throughout the ODL course.
The value of ODL lies in the offer of individualised “coaching” and the setting up of training projects with interactions.
WHAT ARE THE TYPICALMODULES OF AN E-LEARNING COURSE ?
In digital training, the “educational module” is a unit in the same way as the “lesson hour” is for classroom training. Each module fulfils an objective and must be constructed and designed according to this objective. It is made up of different types of “elements”:
lesson sheet with text, complementary multimedia document (video, photo, ppt, Google Doc, Prezi, etc.) or question. Each of them must have a specific purpose, as it is important not to overload the module unnecessarily.
PRODUCING A DISTANCE LEARNING PROGRAMME : THE STEPS
1st step : the educational engineering or design phase
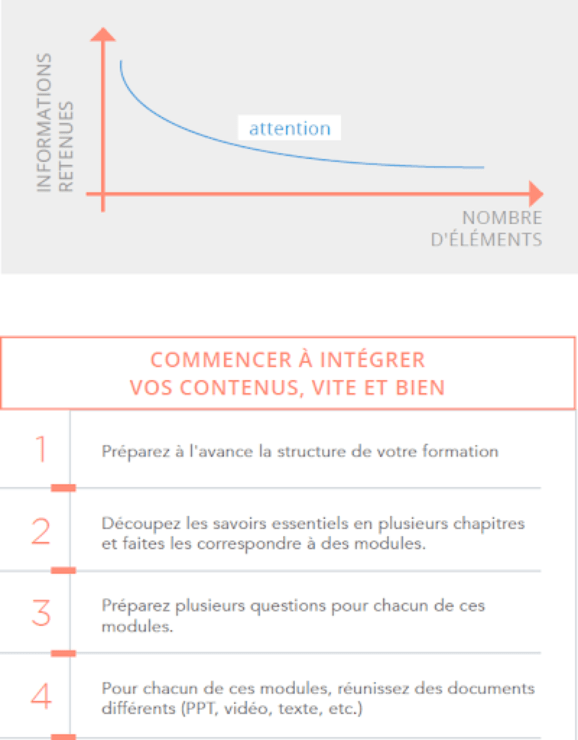
During this stage, the structure of the training course should be designed in advance (what sections? Which essential knowledge? etc.) and which knowledge should be delivered at what time and in which context should be determined.
- The writing work begins here.
Pedagogical designers all agree that writing the voice-over, i.e. the script or scenario, requires a lot of work from the facilitators or subject experts. It seems that the time dedicated to writing the script and planning is more important than the recording itself and the post-production.
Once you have identified the structure of your lessons, define the main outline of the content, indicating the key points. In doing this, you can add notes and comments about what must absolutely be developed for each one of them.
Choose the tone of your lectures and don’t change it. It should always be suited to the subject and be consistent from beginning to end.
Use a conversational style. The point here is to avoid the feeling that you are dealing with a robot or reading a manual. Favour current language rather than a formal style, however, avoid being too informal. And don’t forget to be consistent with which person you use: First, second or third person? It shouldn’t change, so when writing think about the tone AND the perspective, without neglecting the consistency of both.
In your first speech, start with: “Hello, I am First name, last name, job title”, then introduce the title of the unit. An educational unit is the smallest part of a training course, corresponding to an independent and coherent educational objective. It must be able to be used independently of other teaching objectives and may, for example, be a powerpoint slideshow (originally intended for classroom use) transformed into an e-learning resource. If you are providing a continuation of a previous presentation, introduce the unit title directly. Note that the script will provide you with a framework that will avoid starting from scratch each time.
Go straight to the point: speakers want to explain everything, but to streamline the script writing, keep your sentences short and to the point. The risk is that your audience will “tune out”. Apply this simple rule: one important idea per sentence, one major concept per slide.
Announce the transitions clearly. They will be of great help in to facilitating understanding when moving from one idea, chapter or topic to another. For example: “Now that you have a good understanding of X, let’s go further to see how X applies to Y. ”
Think of the 130:1 ratio.While writing, just remember that 130 words is about one minute of audio recording.
- Prepare your script for recording
The script will serve to structure your content at a granular level and to help you interpret concepts in your own way, in your own words. The script should be in .txt, .doc, .odt format. It must be easy to access and change at any time to optimise during the recording as well as during the production and sub-titling phase.
Make a test recording by running your script through a “Prompter” using the tool : https://cueprompter.com/. It is an efficient way to check the running and content of your script, to eliminate any awkward transitions or turns of phrase.
- Prepare your PowerPoint document
This document will be displayed during your filmed audio, thanks to editing work. Generally, you should use simple visuals. Avoid displaying visuals with no commentary, but on the other hand, you can say things that are not presented on your course material.
In order to follow the brand identity and retain consistency across all educational resources within the school, we provide a document template to use for your content.
Depending on the application, the appearance or visual recording of the speaker is not always compulsory and can be replaced, for example, by screen shots of a demonstration with a voice-over recording for comments and instructions.
The document template as well as the brand identity will be defined and made available on the INTRANET after discussion workshops with all participants.
Favour images over text and don’t hesitate to take a photo or video of your work environment.
If you use images that do not belong to you :
- Obtain permission from the authors to use their images for educational purposes and for free.
- Note the name they wish to include in the end credits
- Send the production (technical team) a written record of their agreement (an email with a header is sufficient).
WHICH IMAGES TO USE ?
To be able to include visuals in the training and your materials, you must use royalty-free images.These images are, most often, licensed under a “Creative Commons” or “CC” license.
The images are rare! So, it may be difficult to illustrate your point precisely with these image selections.
ROYALTY-FREE IMAGE BANKS AND CLIPS
These sites offer royalty-free images :
- Pixabay
- Pexels
- Wikimedia Commons
- Icons : Iconfinder, Flaticon
SUPPLY THE LINKS
When you use an image, please supply the exact URL where you found it. You can, for example, write the URL below the image in your PowerPoint.
To To include it in the training, we need to find the image and its author in order to credit it in the video.
USE YOUR OWN VISUALS
It is possible to use your own visuals to illustrate your lessons. To do this, you must either :
- Ensure you are the copyright owner, or
- That you ask the owner of the work for permission to re-use it in the context of the training. An email is enough to prove this permission.
That you ask the owner of the work for permission to re-use it in the context of the training. An email is enough to prove this permission. Follow the brand identity in order to ensure consistency with all the other training materials.
The educational script will be developed in collaboration with the internal team, as we will provide support to ensure the consistency of the content and form of your course. However, you can prepare the content of your PowerPoint beforehand.
2nd step : Production
The content production stage is very important. We will bring your content to life, so we need your availability to ensure we agree on what was initially planned and what is possible. By this we mean lots of feedback and discussions between us to correct early versions of videos if necessary.
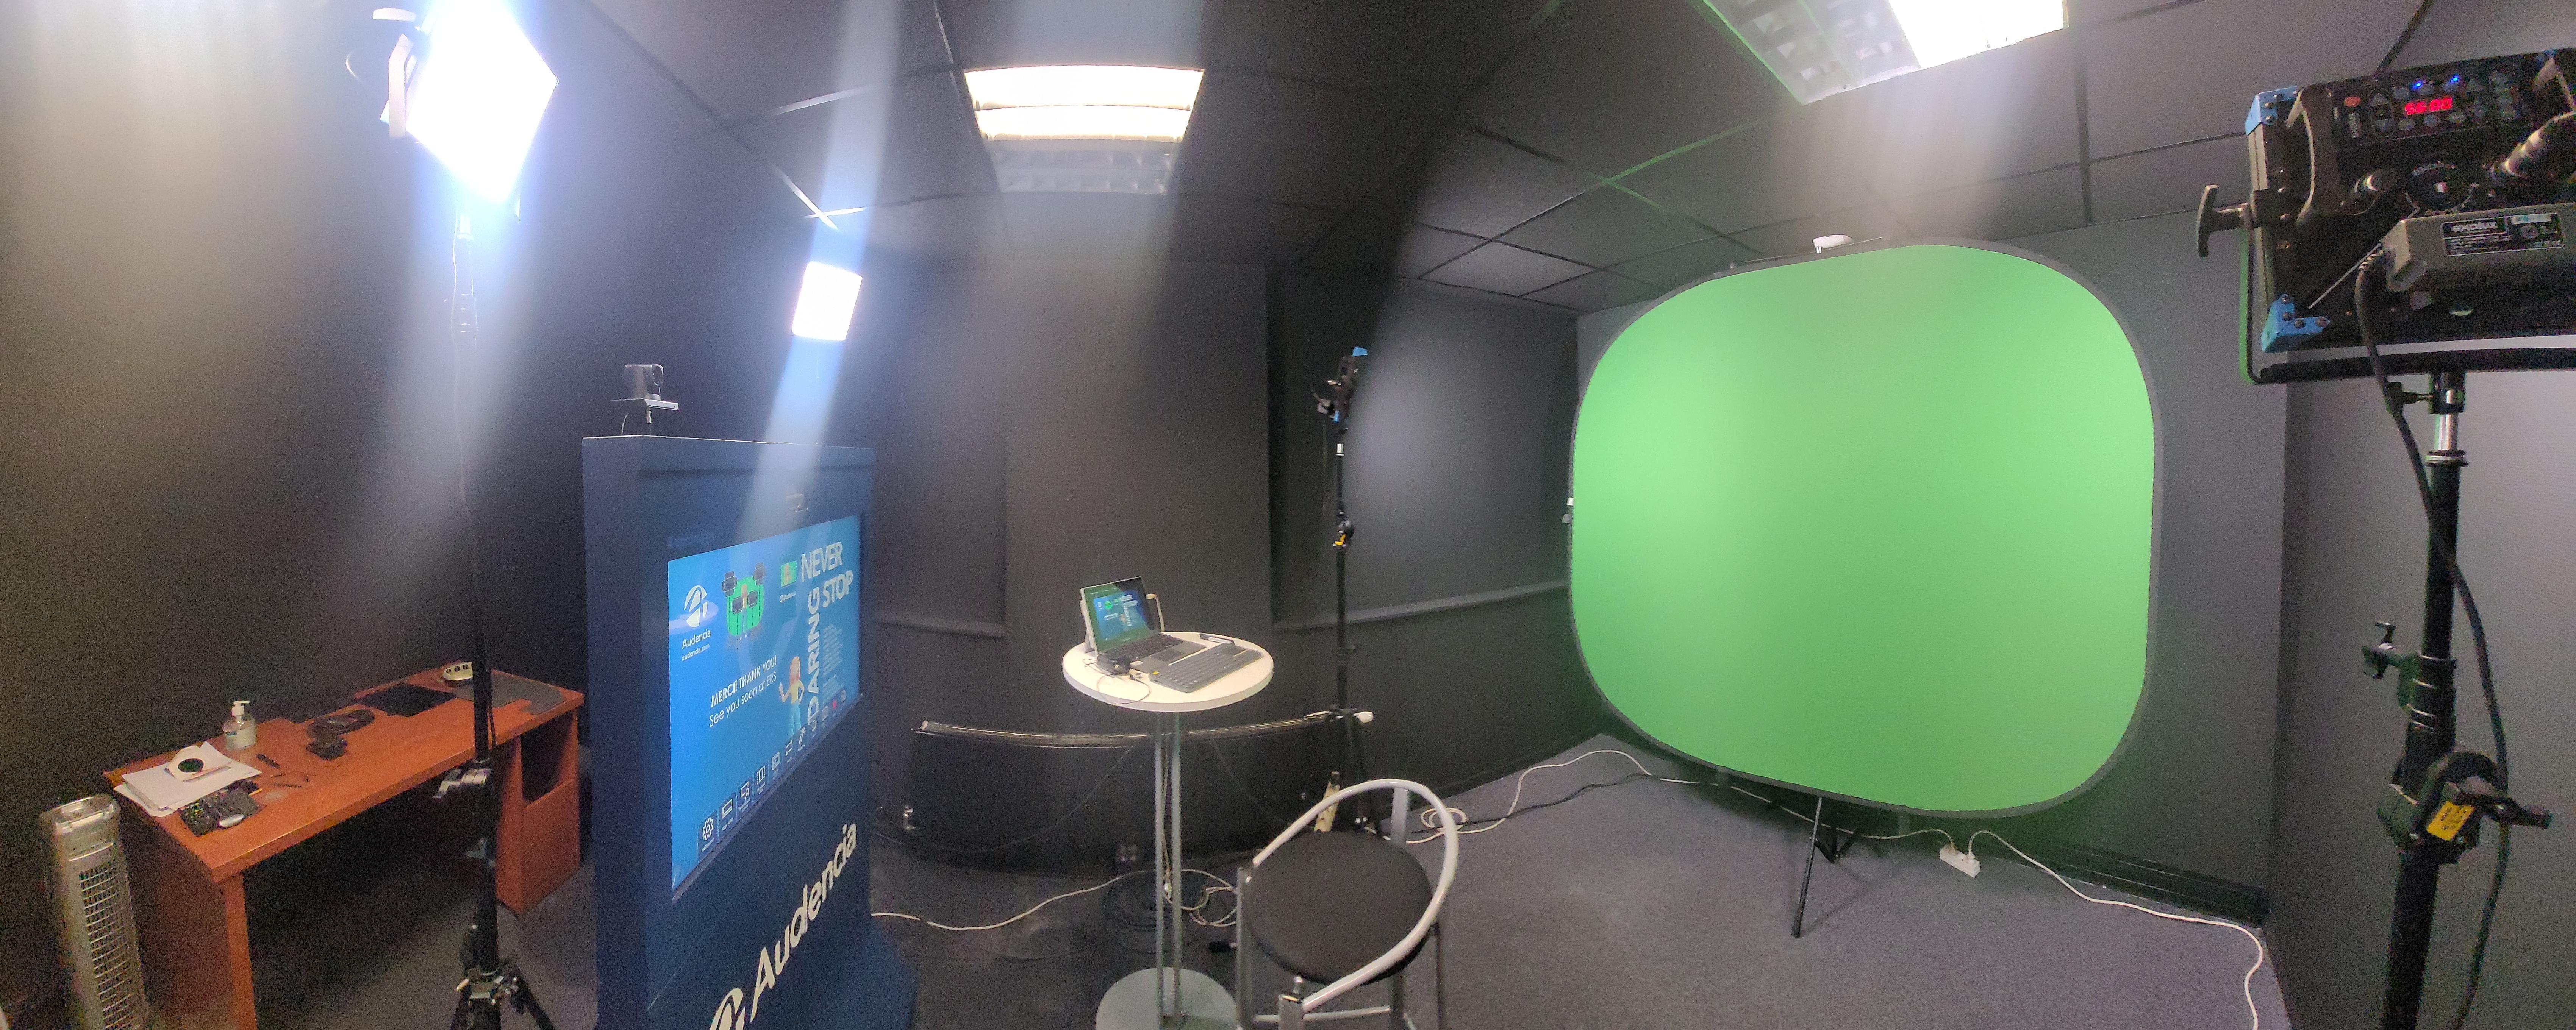
You can find many examples on the internet about tools and shooting methods but to illustrate what we mean, here is what it might look like in a filming room equipped with :
a green background, lights, a camera and one or more prompter(s) (where the script and your material will be scrolled) :
Easy Recording Studio installed in our premises at Atlantic Campus is an open access recording device (booking 185 ECE via Outlook). It is used in projects for PGE, MSIM China, Gaïa, Executive Education and potentially other projects. The device is used autonomously with a single user who brings his course support and gets in front of the camera to film himself. The objective is the production of video with slides accessible asynchronously, with or without post-production and no need for advanced technical knowledge.
Don’t hesitate to consult the articles Feedback session : EASY RECORDING STUDIO & L&T feedback session: Easy Recording Studio & Panopto video server and/or contact us via the the form in order to obtain the prerequisites and benefit from the necessary support in creating your pedagogical resources.
The equipment to bring on the day of your recording :
A USB key,for 2 reasons :
– To load the text (your script) to display on the prompter
– To take away the video that you will produce
The purpose of this COMPUTER with an HDMI socket in order to connect to Rapidmooc studio to broadcast your presentation material on the screen (PDF, PPT, etc.).
If you have any questions during your registration please contact the audiovisual support at 02 40 37 34 40. or via assistance.audencia.com
Some tips on how to present effectively on camera:
- Dress, hair and make-up
A filmed presentation is like a first impression. What impression of yourself do you want to give? Your outfit, including your hairstyle and any accessories you wear, should be purposeful.
Choose an outfit that fits you (if it is too big or too small, it will show and give a bad impression), is clean, and if possible is comfortable so as not to add to the pressure.
Dress in an understated way, with no green and no stripes because the shooting may take place in our editing room in front of a green screen which, during editing, will be replaced with your PowerPoint material. Also avoid overloading with accessories (jewellery).
You should not wear too much make-up. Its main purpose is not to shine like a mirror with the lights, which can be a distraction.
- Face the camera
The camera should be seen as a benevolent friend who listens to you with a smile. Talk to it quietly as you would talk to a person and smile back at it. This will make you feel much more comfortable.
- Pace and volume
Pace yourself. When reading, our brains need breaks to assimilate the information being presented. A learner needs these same pauses to integrate what they have just heard. Technically, it is possible to cut the recording and resume it later, or even, if you stumble on a part, to film it several times in a row.
Breathe normally and you will speak normally. Do not speak in long, monotonous sentences. Instead, use commas to breathe and give your sentence space. Emphasise important words in your sentences. Nothing is more soporific than uniform speech. As for volume, if you speak too softly, a weak voice does not inspire confidence. Be clear enough to make every word understandable.
Body language
- The face
A robotic, inexpressive face is distracting and makes you look like you are hiding something. It is the whole face that expresses your speech and reveals what you really mean when you speak. When you say something, think it (hence the importance of speaking calmly and punctuating sentences) ...and your face will express it.
- Hands and arms
Hands and arms also speak. Crossed arms are a sign of being closed, defensive, tense. Clasped hands are a sign of attention.
Use your hands to punctuate your sentences, but avoid tilting your hands, it distracts attention.
- Posture
Stand straight but not to attention... This is why chairs have backrests. Don’t slouch forward or backward, but be attentive to the person you are talking to. Don’t lean to the left or right, which will make you feel unbalanced.
Stand up straight enough to breathe well without straining (actors, singers and wind players are taught to breathe from their abdomen rather than their chest).
- Movement
Framing is important. Don’t make movements that will take you out of frame. Don't walk like a bear in a cage or an executive on the phone.
In fact, managing movement in theatre is an advanced level skill... to start with, stick to a fixed position, that will be difficult enough to master.
- Practice
Rehearse in front of a mirror so you know what you look like. Look at your posture, your hands, your eyes, your face... then make the necessary changes to make it more natural and spontaneous.
- Role models
Turn on your television and watch... the news! Because they do what you are preparing to do on a daily basis... and they are pros! Record them and try to mimic their attitude, their gestures, their intonation...
As for the rest ... it’s up to you !
3rd step : technical integration on the LMS
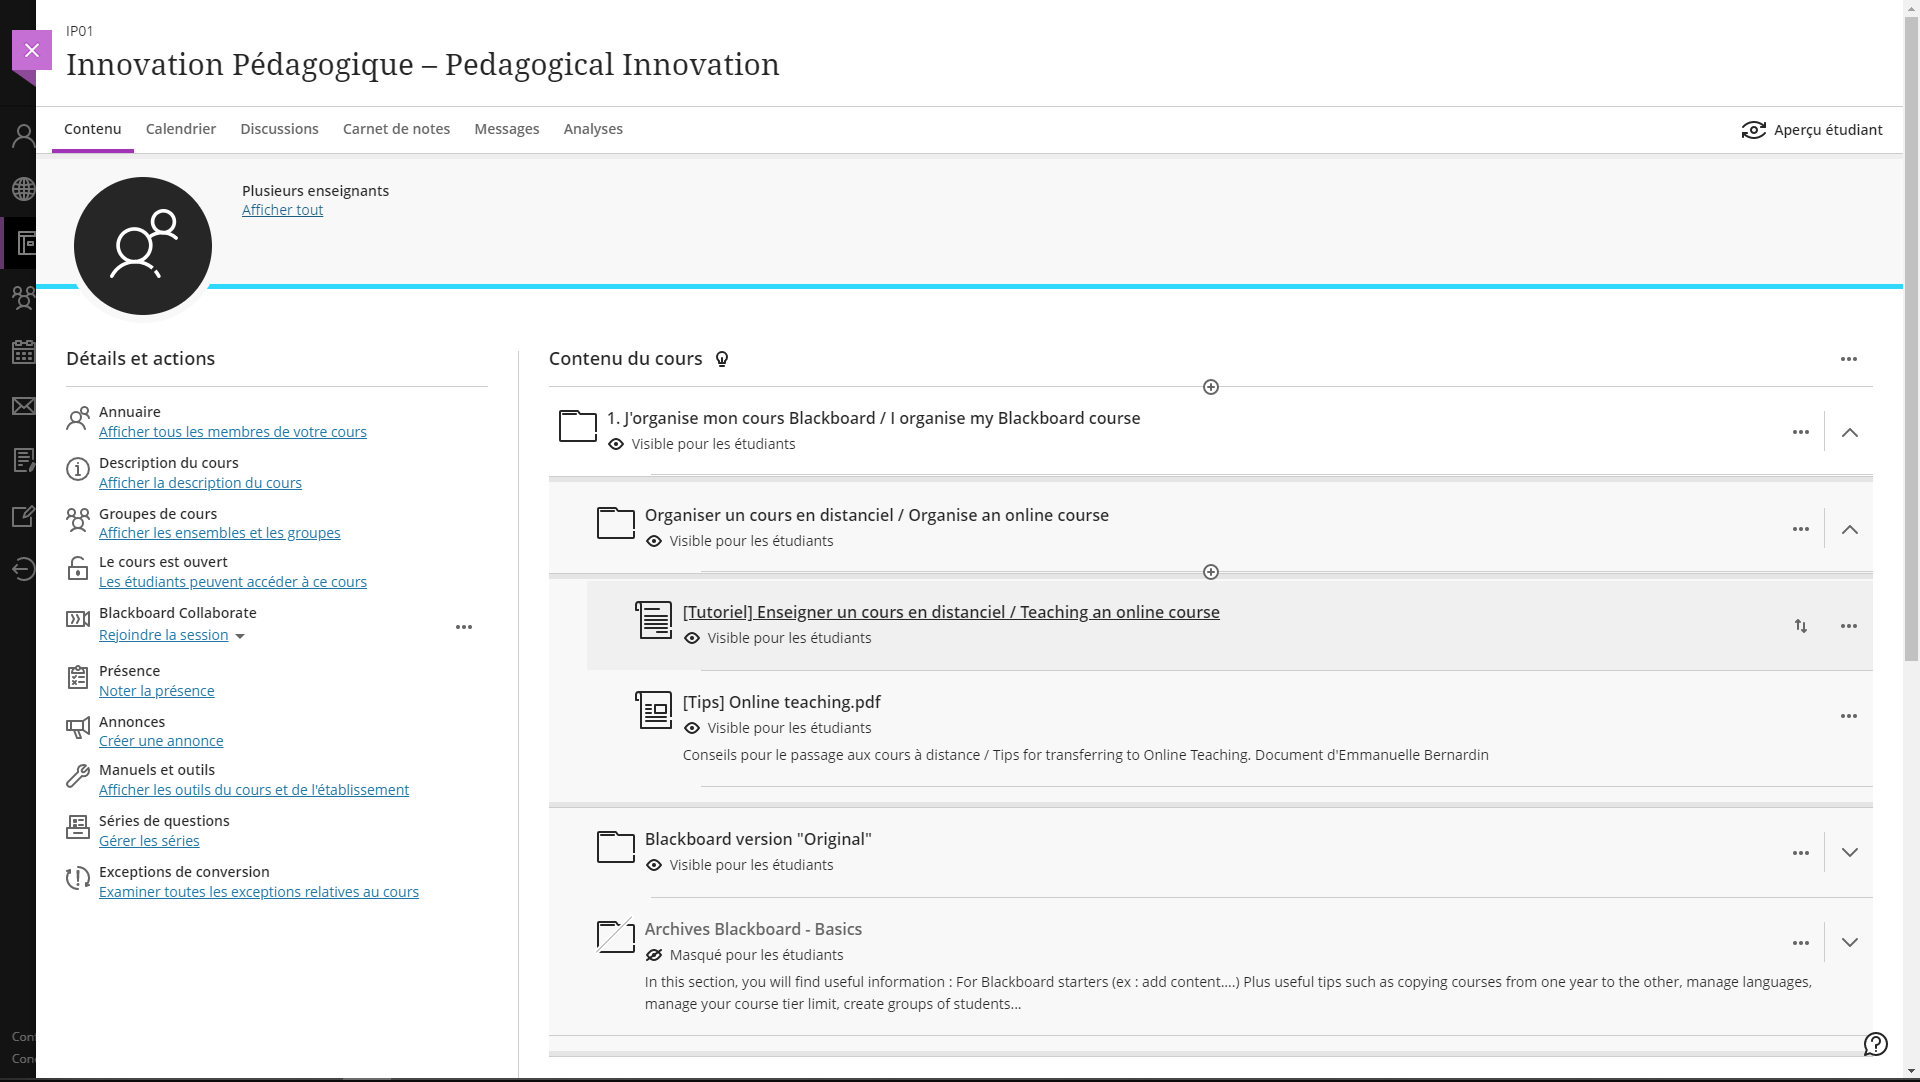
The technical integration phase, the last step before the launch of the FOAD is to format the content on the learning platform and management of educational resources such as Moodle/Blackboard/CrossKnowledge…. This step is assisted by the technical team who is in charge of the content implementation. If you have any questions when integrating your course content feel free to contact LMS support via assistance.audencia.com.
the course space on LMS Blackboard or CrossKnowledge (document storage, online exams with assessment grids, forums, Wikis, project group management, etc.)

4th step : facilitation of the training
The facilitation phase enables the learners’ commitment to be encouraged. At the start of the ODL course, you will have to manage the interactions on the platform and support the learning communities: this is the key to engagement. A learner may well not have understood something about the course and they may state erroneous concepts to other learners, which may cause some of them to lose their way... Your intervention is essential to restore the situation.
Keep these tools in mind for your learning activities :
- Virtual Blackboard Collaborate rooms for lectures + group work sequences (more limited groups). They are particularly suitable for Q&A sessions.
- Online group tools for group design thinking/brainstorming (Draft, even the free version, is a very good example of this).
- Group tools that help add interactivity to class or large groups (tools such as Beekast where you can vote, challenges, tag clouds, surveys, and more).
- Tools such as OneDrive, which can be used to organise collaborative documents.
Encore une fois contactez-nous pour un projet via ce the form.
5th Step : The review
Once the ODL project has been completed, the review phase must not be forgotten. This phase is reviewed by the pedagogical engineering team, with or without a link to the DTSI, in order to observe whether the project was a success or not, and to observe what did not work in order to ensure continuous improvement.
